Contents
-
Getting Started with eSign -
eSign Feature Summary -
Executing Signatures -
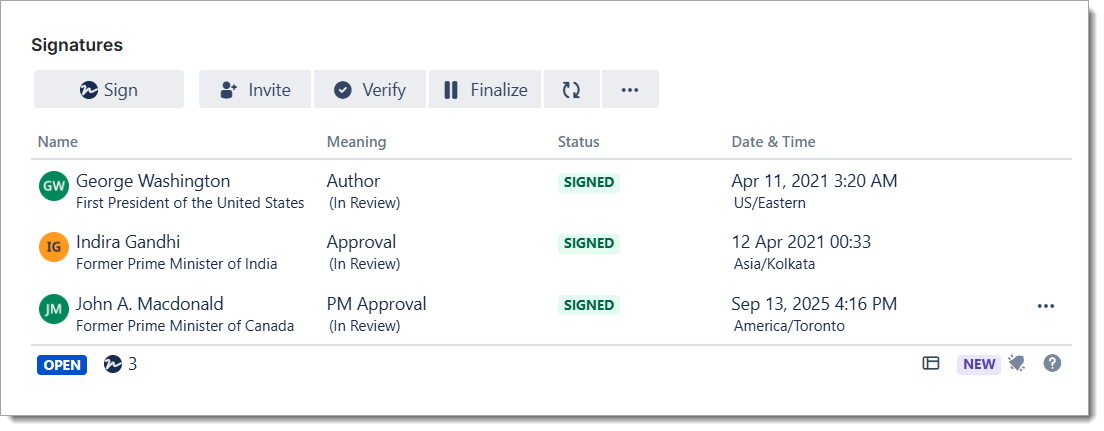
Signature Dashboard -
Signature Invites -
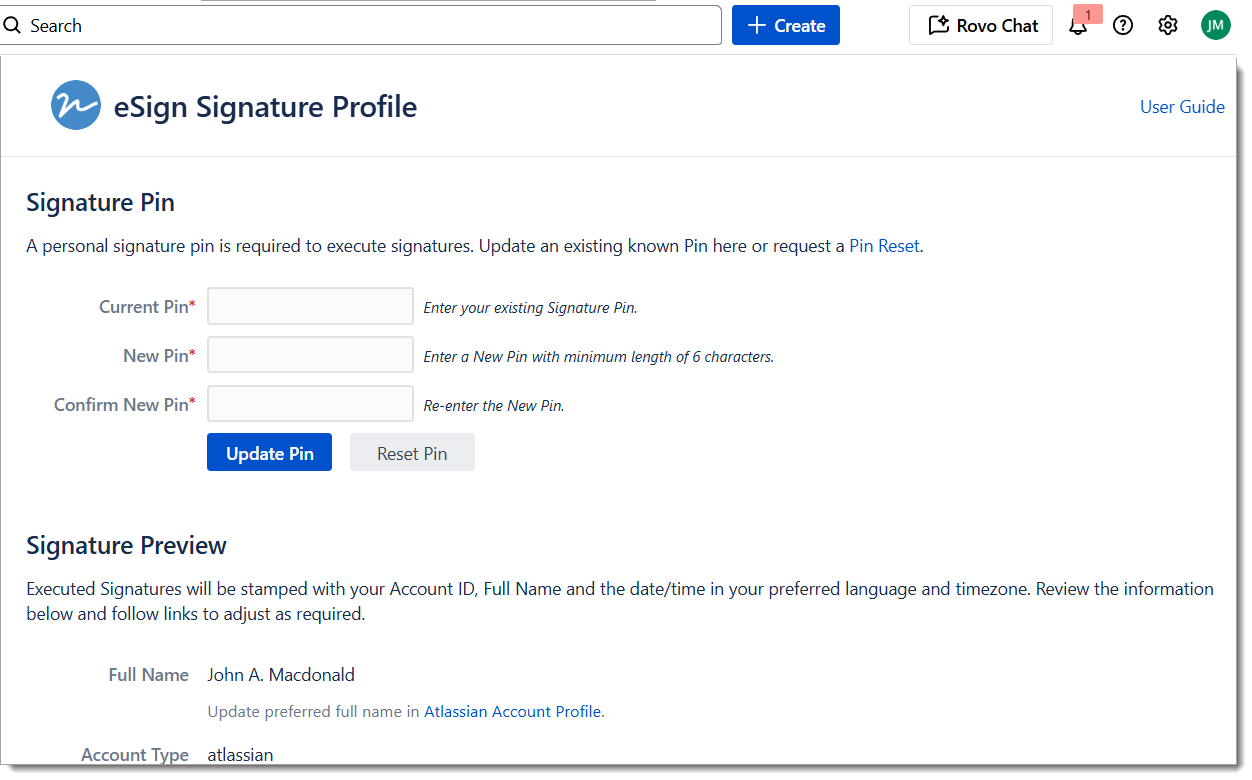
Signature Profile -
Signature Verification Report -
Decline To Sign -
Bulk Signature Operations -
PDF Signature Archives -
Service Management Portal -
Signature Administration -
Signature Audit Events -
eSign Administration and Configuration -
eSign API and Advanced Integration
Signing a Work Item
To sign a Work Item open the Signature Dialog from any one of the following locations:
App Actions > Signatures
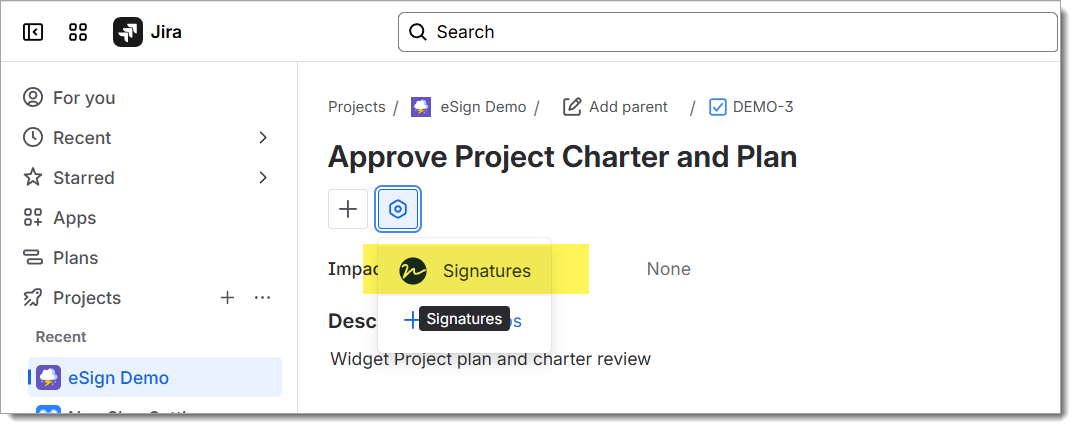
Signatures Panel > Sign
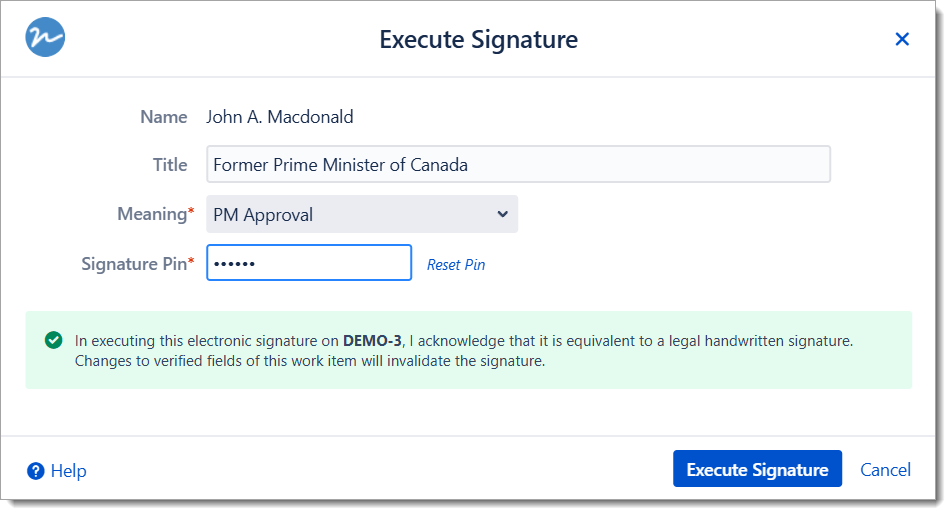
Signature Dialog
Execute a signature using the Signature Dialog. Enter the Security pin and confirm/update the Meaning and press Execute Signature. Once authenticated, the signature will be added to the issue.
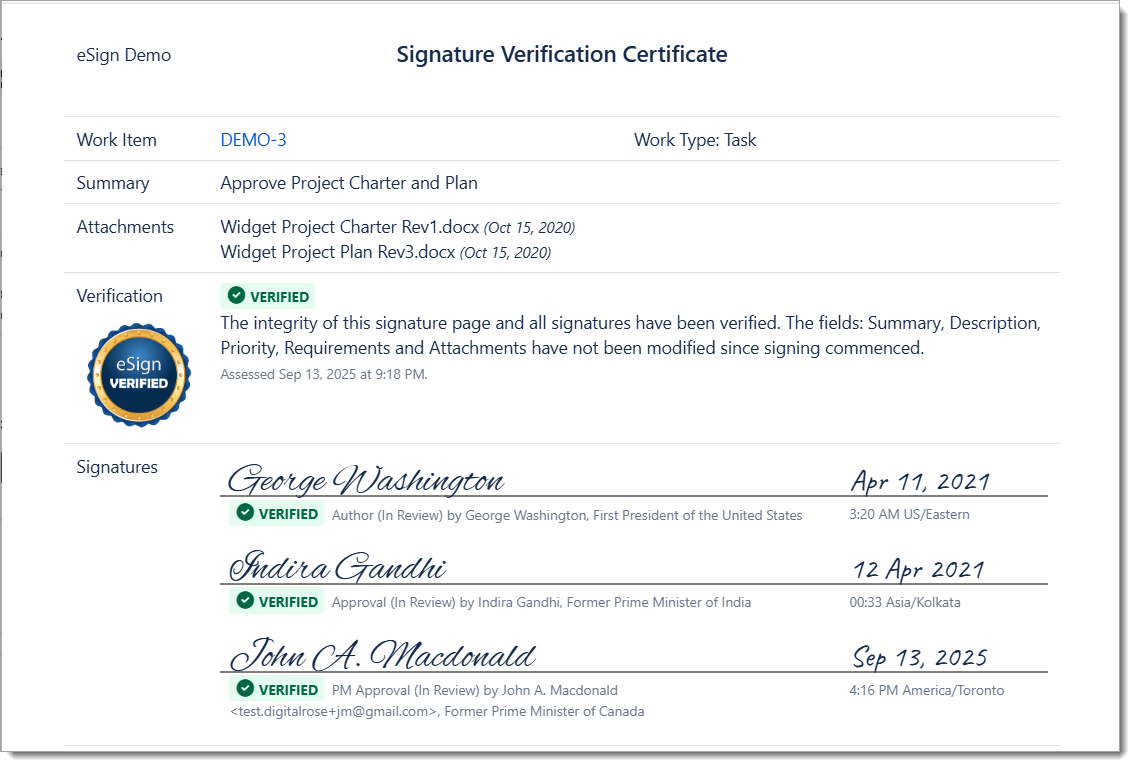
Signature Certificate
A completed Signature Certificate can be generated for any issue. See Signature Verification Report for more information
Signature Pin
Each Signature requires a Signature Pin be enter by the user (after first authenticating to Atlassian Jira). The first time a user opens the signature dialog the user will have to request a new pin before they can complete the signature.
After requesting, the eSign system will generate a random pin for that user and send it to them via an Atlassian Jira issue notification e-mail.
Signature Locking
Each signature is cryptographically locked to the Issue Summary, Description, and Attachments. The Signature Certificate feature is available to confirm that the issue has not been modified since a signature was captured. Modifying the summary, description or adding/removing attachments will “break” the signature lock and show as an unverified signature on the Certificate.
Re-Executing Signatures
A user may optionally re-execute an issue signature. They may need to do this to re-approve an issue after a change, or if they wish to amend the signature meaning.
When a signature is re-executed the previous signature is “voided” and only displayed on the Signature Content panel/tab.